
PTX2FCP User Guide
Follow this step-by-step guide to convert your Pro Tools sessions into Final Cut Pro XML files.
1. Export Session Data from Pro Tools
In Pro Tools, you will want the session that includes ONLY the timeline region of audio you want to export to Premiere.
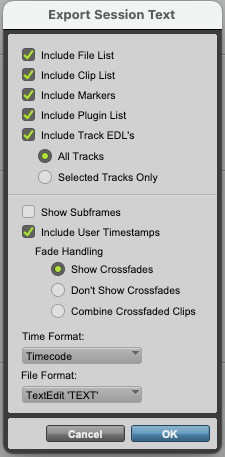
To begin the conversion process, you need to export your Pro Tools session data as a text file.
In Pro Tools, go to File > Export > Session Info as Text. This will create a comprehensive
text file containing all track information, edit points, and timing data that PTX2FCP needs to generate
your Final Cut Pro XML file.
- Note: You must have ‘include user timestamps’ selected
- Note: In the pro tools session you can highlight which tracks you want to export, then in this window click ‘Selected Tracks Only’ to only export those tracks.
2. Upload Your Pro Tools Text File
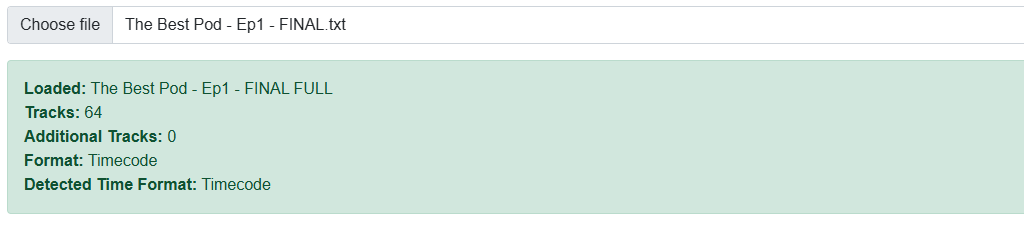
Click the "Choose File" button in Step 1 and select the text file you exported from Pro Tools. PTX2FCP will automatically parse the file and detect the time format used in your session (timecode, feet+frames, or minutes:seconds).
Once uploaded successfully, you'll see a summary showing the session name, number of tracks, detected time format, and any additional tracks. The system supports files up to 10MB in size and will validate the format to ensure compatibility.
3. Link Video Files to Audio Tracks
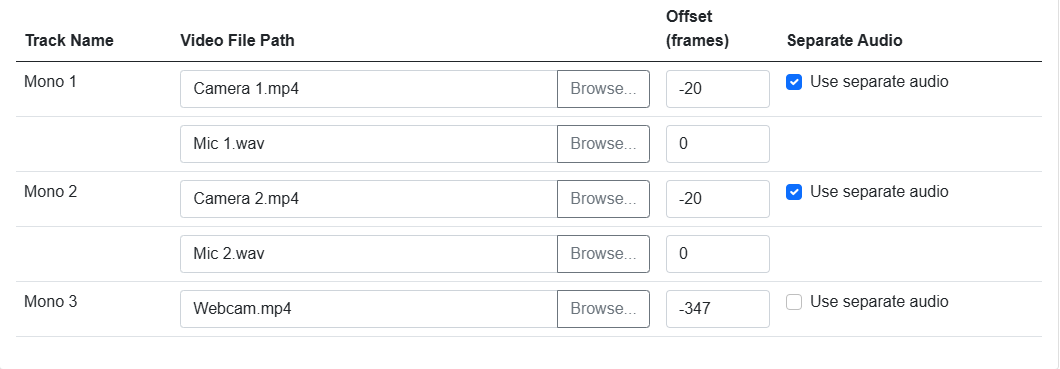
Link your video files to the corresponding audio tracks. For each track, you can either type the file path directly or use the "Browse..." button to select files. PTX2FCP supports common video formats including MP4, MOV, AVI, MXF, and MKV.
Use the offset field to adjust timing if your video and audio don't start at the same point. The offset is measured in frames, frame and time format calculator provided with an detailed example of working out the offset. You can also choose to use separate audio files by checking the "Use separate audio" option, which is useful when you have high-quality audio masters separate from your video files.
4. Additional Tracks
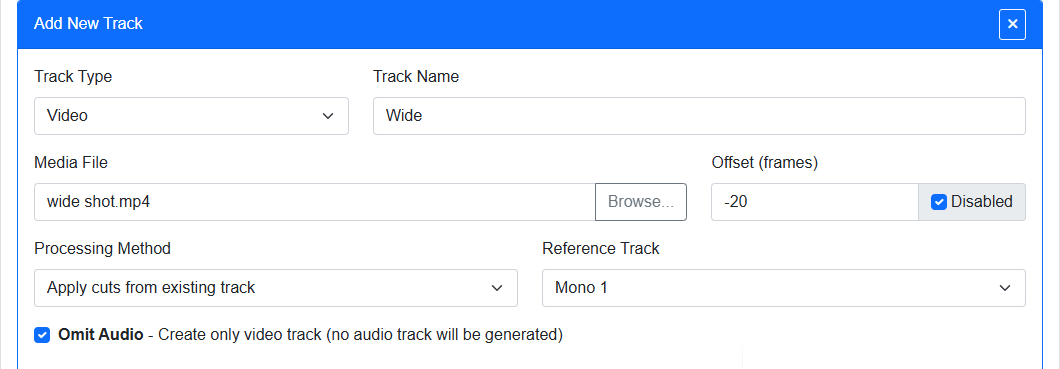
Add any additional media here, media will be added as a new track in the generated session. Have media added either enabled or disabled and option to omit an additional audio track when adding additional video tracks.
Processing Methods
Single Clip- The media will be added as a single uncut clip to it's own track. When single clip is selected the frame input will state duration, duration is required for the clip to add correctly. Calculate the duration in frames with the calculator provided.
Apply Cuts- Select a parent track to mirror the cuts from. When selected the frame input will be stated as offset. This offset is treated as such as the link media offsets to ensure the clip cuts are bang on.
5. Configure Filters
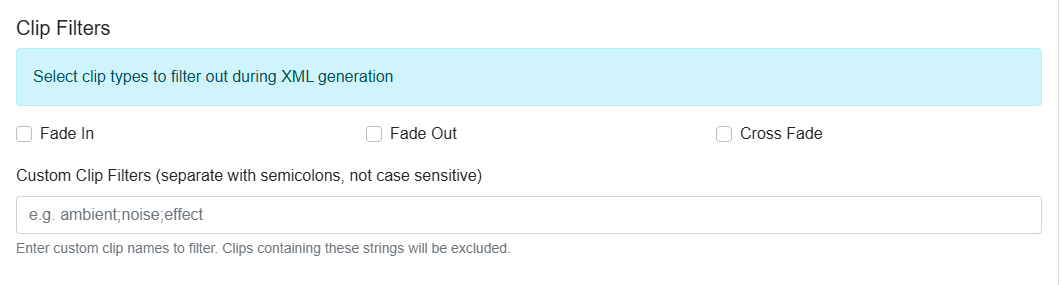
Customize your XML output with clip filters and cut styles. Use the clip filters to exclude unwanted elements like fade-ins, fade-outs, cross-fades, or any clips by name. Simply pass a string list of names (delimited by semicolons), the list is not case sensitive.
6. Choose Cut Style
Regular- a traditional looking edit style with just the clips from the imported timeline. No additional clips clips added to tracks, a "deletion" style edit.
Filled- all clips mirrored across all tracks with additional clips added and disabled. No gaps in tracks, for quick toggling between shots, a "splice" style edit.
7. Generate and Download Your XML File
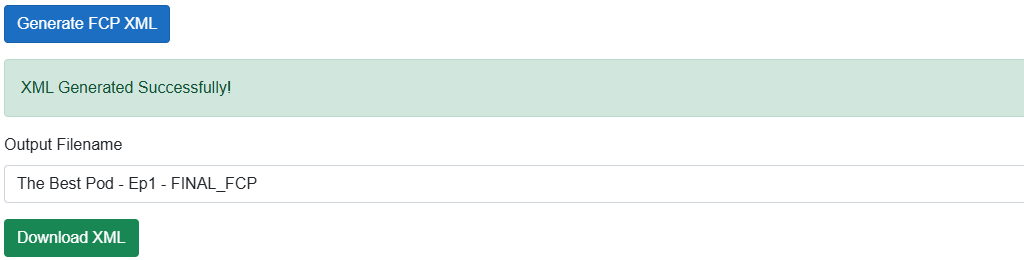
Once all your media files are linked and settings configured, click "Generate FCP XML". After generation, you can customize the output filename and click "Download XML" to save the file. Place the file in the directory will all your linked media.
Import this XML file into Final Cut Pro using File > Import > XML OR Open Project, and your project will be created with all tracks, edit points, and media links exactly as they appeared in your Pro Tools session.